Saturday, May 29, 2010

Protein Pancake

Similar in texture to a crepe, this pancake is a protein powerhouse, making it a great addition to a post-workout breakfast. Without real maple syrup on hand (I accept no substitutes, sorry Aunt Jemima), I resorted to topping with some blackberry jam and some strawberries. Delicious.

This recipe makes one medium pancake. I use "natural" protein powder, meaning that it is essentially flavorless, so I added a hefty dash of cinnamon and some sweetener to make it palatable. Still, flavored protein powders (such as chocolate or vanilla) are definitely an option, and you can change things up a bit if you try different flavored yogurts!
The Stuff:
  • small sauté pan
The Edibles:
  • non-stick cooking spray
  • 2 T. protein powder
  • 1/4 tsp. baking soda
  • 1/3 c. Greek yogurt
  • 1 egg white
  • 1 T. water (omit if not using Greek yogurt)
The Making:
  1. In a small bowl whisk together all ingredients. The batter may be a bit thick.
  2. Place a small sauté pan over medium heat and spray with non-stick cooking spray.
  3. Pour batter into pan and cook like a normal pancake. The cake will be ready for flipping once it appears less glossy and firmed up.
  4. Serve with whatever toppings you desire.

Friday, May 28, 2010

Black Bean Corn Salsa


This salsa really is the ultimate salsa. And I take my salsas very seriously. I cannot remember where I first came upon the inspiration recipe for this Britt-ified version, and I wish I could give it some credit, but alas, a Google search gave me no leads.

Fresh-tasting with a bit of cool kick provided by the lime juice-hot sauce combo, this salsa is a great way to enjoy your vitamins. For best results (if you have the self-restraint), allow the flavors to be enhanced for an hour or more in your refrigerator.

If your kitchen is void of cilantro (as mine was this afternoon), you can substitute other herbs for a different flavor. I used a 1/2 tablespoon each of dried oregano and parsley, and the result was quite enjoyable. Still, if you have the means, I highly recommend picking up fresh tomatoes and cilantro for an ultra refreshing salsa that will leave you wondering what happened to all of your tortilla chips.
The Edibles:
  • 1 can diced tomatoes, drained well (or 1 & 1/2 c. deseeded, diced fresh tomatoes)
  • 1/2 of 1 can black beans, drained and rinsed
  • 1 c. southwestern blend frozen vegetables (typically includes corn, diced bell peppers, and diced onion)*
  • 3 T. lemon or lime juice
  • 1/2 T. powdered garlic
  • 1/2 c. chopped cilantro
  • 1/2 - 1 T. hot sauce (such as Tabasco)
  • salt and pepper to taste

    *Alternatively, you can use 1/2 diced vidallia (sweet) onion, 1/2 cup corn, and 1/2 diced bell pepper.

The Making:
  1. Combine all ingredients in a large storage container. Stir well; devour.

Tuesday, May 25, 2010

Orange Chicken

I've been craving Chinese/Asian food lately, so this really hit the spot. The highlight of this dish was the orange marmalade, compliments of the $30 breakfast buffet at the Marriot Marquis New York City. I've been wanting to make my own orange chicken from scratch (just so I know what really goes in it), but have been too budget-conscious to pick up marmalade knowing that I will only need just a bit of it and probably won't use it otherwise. This dish is sponsored by the extra special family member that picked up that ginormous breakfast bill!

The marinating step is one that you can easy omit if you're like me and often fail to plan ahead in your meals. Luckily I had the assistance of an extra awesome helper who got home early enough to give the chicken about 2 to 3 hours to soak up some added orange-ness.

You'll see that I served this alongside some homemade vegetable fried rice (another dish I have been craving lately) that contained carrots, peas, and rutabaga. Feel free to compliment this dish with any vegetables you have on hand and some rice (or quinoa) to soak up the sauce.
The Stuff:
  • sealable bag for marinating
  • small bowl
  • whisk (or fork)
  • large saute pan
The Edibles:
  • 3 skinless, boneless chicken breasts
  • 1/4 c. orange juice
  • 1 T. & 1 tsp. olive oil, divided
  • 2 tsp. ginger, divided
  • 2 cloves garlic, minced, divided (or the equivalent in jarred or powdered)
  • shake of onion powder
  • salt and pepper
  • 3/4 c. low-sodium chicken broth
  • 1 T. red wine vinegar
  • 3 T. orange marmelade
  • 1/2 tsp. dijon mustard
  • 1/2 T. light soy sauce
  • 1 tsp. cornstarch
  • 1 large shallot, minced
The Making:
  1. Cut up chicken into bite-sized pieces. Place in a sealable bag to marinade with orange juice, 1 T. olive oil, 1 tsp. ginger, 1 clove garlic, onion powder, and a sprinkle of salt and pepper.
  2. In a small bowl whisk together broth through cornstarch, remaining 1 tsp. ginger and 1 clove garlic. Set aside.
  3. Spray a large saute pan with nonstick cooking spray and place over medium heat. Remove chicken from bag and place in saute pan. Discard marinade. Cook chicken for 5 to 7 minutes and remove from pan.
  4. Add remaining 1 teaspoon olive oil and shallots to the pan and cook on medium, stirring often. Cook until they begin to brown, about 30 seconds. Whisk the broth mixture prepared in step two and add it to the pan.
  5. Bring sauce to a simmer, carefully scraping up any browned bits. Reduce heat to maintain simmer; cook until the sauce is slightly reduced and thickened, 30 seconds to 2 minutes.
  6. Add the chicken and return to a simmer. Cook, turning once or twice, until the chicken is heated through and fully coated, about 1 to 2 minutes.
  7. Remove from the heat and serve with sauteed vegetables and rice!

Thursday, May 20, 2010

Baba Ganoush

I'm no expert at this, but here's my attempt at Baba Ganoush, a hummus-like dip made from cooked eggplant. Curiously, a baba ganoush recipe was requested by my aunt, who has recently shared with me that she doesn't think she will ever follow my recipes exactly. I guess I can't blame her, because I'm the same way, but why then, I wonder, does she make special requests for me to feature a dish? Is it for the pictures?

Often served with pita chips, bell pepper strips, and other veggies, it's loaded with vitamins and essential nutrients. Tahini is a good source of calcium, protein, B vitamins, and essential fatty acids. Eggplant is a great source of antioxidents (disease-fighters), and the skin contains Nasunin. This is a potent antioxidant and free radical scavenger that has been shown to protect cell membranes from damage. Knowing this, I did add about half of the not-so-charred skin back into my ganoush. The addition provided a bit of smokey flavor and a bit of texture.
The Stuff:
  • baking sheet
  • blender or food processor
The Edibles:
  • 1 medium-small eggplant (mine was about 1 pound)
  • 1 T. tahini (roasted sesame paste)
  • 1/2 tsp. lemon juice
  • 1 clove garlic, minced (or the equivalent in jarred or powdered)
  • sprinkle of chile powder
  • generous shake of ground coriander
  • 1 T. dried parsley or cilantro leaves
  • optional: 1 T. olive oil
  • salt and pepper to taste
The Making:
  1. Preheat broiler to high. Use a fork to prick eggplant a few times; place on a baking sheet and set directly under broiler to crisp/char skin of eggplant. This can also be done over a charcoal grill or using the stovetop of a gas stove. Watch carefully and turn occassionally in order to evenly char.
  2. Change oven temperature to 375 and roast eggplant in the oven for 20 to 30 minutes, or until they're completely soft. You can test the softness by poking plant with a paring knife; if you have no resistence, your eggplant is done.
  3. Remove from oven and let cool.
  4. Slice the eggplant in half and scrape use a spoon or fork to scoop out the pulp. Puree the pulp in a blender or food processor with the other ingredients until smooth.
  5. Taste, and season with salt, pepper, and additional lemon juice, if desired. Chill for a 3 hours for best results.

Tuesday, May 18, 2010

A "Boot-e-full" Quinoa Lunch Salad

This salad is the product of a special request from my one and only Momo,
a.k.a. the one who wears these:
I love my Momo, despite her rather peculiar sense of style.

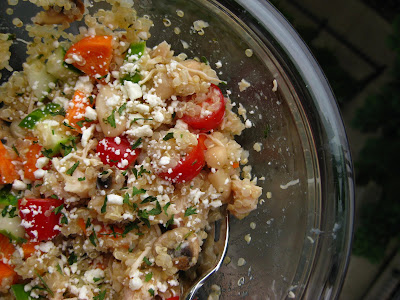
Style aside, my mom is my idol. Her dedication to her work and health inspire me and those around her to live healthfully. A request for a lunch salad could not go unheard. Easily prepared ahead of time (in fact I recommend doing so in order to allow for maximum flavor enhancement), and extremely versatile (use whatever veggies, proteins, beans, or cheeses you may have on hand), you have almost no excuse (other than pure laziness) not to trust me on this one and give this salad a try. If you don't like it, don't write me off; I promise that I still have more grainy salad ideas up my sleeve to keep your lunches spiced up and healthful.
The Stuff:
  • medium saucepan
  • small sauté pan
  • a fork, whisk, or blender
The Edibles:
  • 1/2 c. quinoa
  • 1 & 1/2 T. olive oil, divided
  • garlic powder
  • onion powder
  • non-stick olive oil spray
  • about 10 mushrooms, sliced
  • 2 T. white wine vinegar
  • 1 T. dijon mustard
  • dried Italian seasoning
  • 1 tsp. dried dill
  • 2 large carrots, peeled and diced
  • 1/2 cucumber, seeds removed, diced
  • 1/2 c. cherry/grape tomatoes, cut in half
  • 4 oz. cannelloni beans (1/2 of one 8 oz. can)
  • 6 oz. cooked chicken breast, shredded (the equivalent of two breasts)*
  • salt and pepper to taste
  • about 1/4 c. crumbled feta cheese
  • 1 tsp. parsley (garnish)
*see step 4 for vegetarian substitution suggestions

The Making:
  1. Bring 1 and 1/4 cups water to a boil. Add 1/2 tablespoon olive oil, a generous sprinkle of garlic and onion powders, and quinoa. Bring back to a boil, cover, and reduce heat to low. Simmer for 15 to 20 minutes, until all the liquid is absorbed.
  2. While quinoa is cooking, place a small saute pan over medium heat and spray with non-stick cooking spray. Add mushrooms and a light sprinkle of garlic powder. Saute for 5 to 10 minutes, or until the shrooms are dark. Remove from heat and set aside.
  3. In a small bowl whisk together white wine vinegar, dijon mustard, 1 tablespoon olive oil, dill, and generous shakes of Italian seasoning, garlic powder, and onion powder. Add salt and fresh ground black pepper to taste.
  4. Once quinoa is cooked, add to a large mixing bowl with prepared dressing and carrots through chicken. If you choose to make this vegetarian you can omit the chicken and replace with albacore tuna or firm tofu and have fabulous results. Stir to combine.
  5. Garnish with feta and a sprinkling of fresh parsley.

Monday, May 17, 2010

Britt's Crock Pot Barbacoa Chicken


Do you have to cook for a crowd? Does that crowd like chipotle?

Faced with the plan to cook for my chipotle-obsessed family and boyfriend, I thought I would try my hand at making some barbocoa beef. It was during the ingredient-acquiring stage of this meal that I realized how I could not afford to purchase the beef I so desired to cook. Seeing at boneless, skinless chicken breasts were on sale, I decided to be practical (versus broke) and make Barbocoa chicken.

The result? Pure deliciousness.

The ultimate result? A versatile recipe that can accomodate what happens to be cheaper: chicken breasts or 4 lbs chuck roast.

And the ultimate, final, most satisfying result? I fed my family and friends a healthful dish that they enjoyed.

I doubled this recipe to serve a party of 7. It was more than enough!

The Stuff:
  • blender or food processor
  • crock pot
The Edibles:
  • 1/3 cup apple cider vinegar
  • 3 tablespoons lime juice
  • 3 chipotle peppers, canned in sauce (you'l just need a small can for this, and I think I only added 4 peppers for a double recipe, but I'm weak when it comes to spicy things)
  • 4 garlic cloves
  • 4 teaspoons cumin
  • 2 teaspoons dried Mexican oregano
  • 1 1/2 teaspoons ground black pepper
  • 1 1/2 teaspoons salt
  • 1/2 teaspoon dried ground clove
  • 2 tablespoons vegetable oil
  • 4 boneless, skinless chicken breasts
  • 3/4 cup chicken broth
  • 3 bay leaves
The Making:
  1. Combine cider vinegar through clove in a blender or food processor and puree on high speed until smooth. This is your adobo sauce.
  2. Into your crockpot pour 1/3 of the adobo sauce, or enough to thinly cover the bottom of your cooker.  Add oil, broth, and bay leaves. Give it a stir. Lay chicken breasts flat on top of sauce. Pour remaining sauce over the chicken, flipping to make sure the pieces are completely covered. Cook on low for 6 - 7 hours.
  3. Remove the chicken from cooker and shred. Remove bay leaves. Place chicken back into adobo sauce-ful cooker and stir until fully covered. Serve in a burrito, on top of a salad, or smothering a bed of rice. Top with anything you like: fresh tomatoes, salsa, cheese, beans, sour cream, and/or guacamole. For salads, I recommend a dressing made by combining 1 to 2 tablespoons of ranch dressing with a couple spoonfuls of fresh salsa.

Sunday, May 16, 2010

Rhubarb Crumble Bars

Bestowed upon me by my lovely Godmother and Great Aunt: 4 cups washed and cut fresh rhubarb. (I wish I was always so lucky to receive all of my vegetables in this manner.)
My mission: to create something lovely (and healthy) out of this vegetable that would make my gardener proud! The result: a gooey bar with a crispy top, best eaten with a fork (they're a little to fragile for hand-to-mouth eating) that could easily be confused with a tart apple cobbler. Delish.

Poor Herbert. Mean Mommy made him wait while I captured these images before digging in!
The Stuff:
  • 2 c. fresh rhubarb, diced
  • 1 & 1/2 T. honey
  • 1 tsp. lemon juice
  • 2 T. water
  • 2 T. sugar (or 4 packets Splenda)
  • 1/4 tsp. cornstarch
  • 1 & 1/2 T. butter
  • 1/2 c. Bisquick
  • 2 T. milled flax seed
  • 2 T. water
  • 3 tsp. brown sugar
  • 2 tsp. granulated sugar (or 1 packet Splenda)
  • 3/4 c. oats
  • generous sprinkle of cinnamon
The Making:
  1. Preheat oven to 350 degrees. Lightly spray a small loaf pan with non-stick cooking spray and set aside.
  2. In a medium saucepan ring first 5 ingredients to a boil. Lower the heat and simmer for 10 minutes, or until the rhubarb is tender, stirring frequently. Remove from heat and sprinkle in cornstarch. Stir well to combine. Set aside.
  3. Combine remaining ingredients in a small mixing bowl. Stir until well mixed.
  4. Place 1/2 of moist crumble mixture into greased loaf pan and. Pat down into pan so that it is spread evenly. Pour about 3/4 of rhubarb sauce over the crust and spread evenly. Break apart remaining crumble mixture and drop on top of rhubarb sporadically and as evenly as possible.
  5. Bake for 25 to 30 minutes. Allow to cool for 10 minutes. The cook recommends serving with vanilla ice cream or frozen yogurt!

Lip-Smackin' Crock Pot Ribs

If you're a vegetarian, I apologize. This recipe is clearly not for you.

Feeling an aching in my bones for a hearty meal, and decidedly not aching to slave over the grill in order to produce said meal, I settled on testing the waters and trying my hand at some crock pot ribs. My co-worker raved about her success with this method, and LinkI am soooo glad I work with a trustworthy bunch (and not a group of Dwights a la The Office trying to con me constantly)! I think Jay thanks Anne just as much as I do for this fantastic (and easy) rib recipe!

I made my "own" barbecue sauce using a mixture of about 3/4 cup pre-prepared sauce, such as Sweet Baby Ray's (yes, I'm aware that would be classified as cheating, but I wanted to cover my bases in case my mixture was not quite right). To that I added about 1 cup ketchup, 2 T. cider vinegar, about 2 T. brown sugar, about 1 T. Worcestershire sauce, and a little bit of garlic and onion powder.

Serve with extra barbecue sauce, some homemade fries (or carrot fries!), and some baked beans for some real grill-time fun (sans grill)!
The Stuff:
  • crock pot
The Edibles:
  • one slab pork back ribs (cut into two half-slabs)
  • 1 onion
  • a lot of barbecue sauce (I think I used about 2 cups)
The Making:
  1. Mince onion. Place in crock pot
  2. Place about 1/4 cup of the barbecue sauce in the bottom of the pot. Swirl around a bit.
  3. Cover ribs with barbecue sauce. I also picked up some of the onion pieces and put them on the ribs.
  4. Cook for 10 hours on low. Serve with extra barbecue sauce.

Thursday, May 13, 2010

Eggless Tofu Salad

This "egg" salad is so light and low-cholesterol that you can consume a boat load before even beginning to worry that you might be overindulging. I was first introduced to the concept of eggless salad by my Mommom; she often purchased pre-made containers of this salad at her local health food store. Aware that it couldn't be that hard to make, we decided to set out and find a recipe and make it ourselves. The result was delicious, albiet slightly different than the expensive eggless salad from the store and real egg salad. So you have to go in knowing that, yes, it will be unique, but I promise you that it will still be delightfully satisfying on a sammy, paired with pita chips, or atop a bed of spinach.

If you use the tofu that is sold in a cardboard-like box (sometimes in the refrigerated section, but I've seen it at Whole Foods on the shelves near the Asian noodles and sauces), you're better off not pressing the tofu (in other words skip step 1). I've found that this brand is rather fragile, so I am afraid you might have a totally squish-squashed block once you're done. Your tofu eggless salad may be more watery after sitting, but it doesn't mean that it won't be delicious. Simply pour out the water or stir before consuming and you're golden. Otherwise, if your tofu is sold in a plastic container (and refrigerated), press the tofu for best results. I highly suggest making this salad at least 1 hour in advance of planned consumption in order to allow for maximum flavor-melding. Though the salad will be yummy immediately, you won't regret waiting that extra time. I promise.
The Stuff:
  • a cutting board
  • clean kitchen towel
  • paper towels
  • 2 - 3 large books
  • a medium tupperware container (for storage)
  • a fork
The Edibles:
  • 1 block/package firm or semi-firm tofu
  • 2 T. light Miracle Whip, light mayonnaise, or soy-based not-mayo (for a completely vegan dish)
  • 1-2 T. dijon mustard (depending on how dijon-y you want your salad)
  • 1/2 T. dried dill
  • 1/2 T. dried parsley
  • 1/2 T. tumeric
  • light sprinkle of onion salt or onion powder
  • generous shake of garlic powder
  • 1-2 stalks celery, diced
  • light sprinkle of paprika
  • salt and pepper to paste
The Making:
  1. To press tofu: Slice tofu block in half so that you make two thinner slabs. On top of a cutting board place one clean, thick kitchen towel, folded in half once or twice. Place one paper towel folded in half on top of cloth towel; lay tofu slabs on top of paper towel. Cover tofu with an additional folded paper towel. Place 2-3 large cookbooks (or if you’re me, public health textbooks) on top of tofu, so as to press out some of the water. After at least 30 minutes, flip over cloth towel, replace paper towels, and flip over tofu. Re-cover with heavy books and allow the tofu to be pressed for at least 10 more minutes.
  2. Mash up tofu with a fork. Add remaining ingredients and stir well. Cover and refrigerate for at least 1 hour.

Wednesday, May 12, 2010

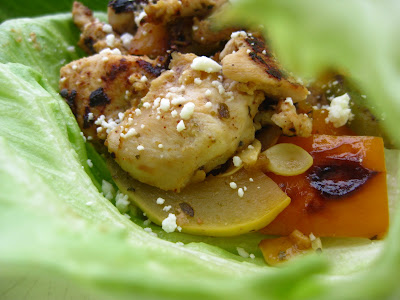
Easy Chicken Lettuce Wraps

I came up with dish on a whim one night, and it never ceases to amaze me how easy it comes together. I've always thought that chicken needs at least 1 hour to marinate, but I think the bite-size pieces give some wiggle room if you're short on time (and have a growling tummy). Though I have a sensitive tongue (meaning I don't like my food hot by any means), I really enjoy the little bite afforded by the addition of chili pepper and a generous amount of coriander. Nevertheless, I respect differences in tastes and suggest adding spicy things slowly, tasting often.

You can vary the added sautéed vegetables based on what you have on hand, or what happens to be nearing the end of its lifespan in your fridge. Maybe it's the German in me, but I love this recipe simply for the fact that it awesomely uses up those vegetables that you dare not waste.
The Stuff:
  • gallon size plastic close-able bag
  • medium-sized sauté pan
The Edibles:
  • 2 boneless, skinless chicken breasts
  • 2 T. of a light vinaigrette dressing (I recommend an Italian or Greek style)
  • generous shake of garlic powder
  • generous shake of Italian seasoning
  • light shake of chili powder (for a little kick)
  • shake of ground coriander
  • light shake of onion salt
  • pepper to taste
  • olive oil cooking spray spray
  • 1 T. garlic, minced
  • lettuce (butter, bib, or (if you're poor like me) iceberg)
  • sauteed vegetables
  • optional: feta cheese, hummus, dressing of choice
The Making:
  1. Trim chicken breasts of fat and cut into chunks about 1 inch by 1 inch. Place chicken pieces in a gallon size plastic bag with remaining ingredients (through pepper). Massage the meat in the bag to ensure marinade is evenly dispersed. Place on a plate and refrigerate at least 30 minutes.
  2. Once marinaded, coat sauté pan lightly with olive oil cooking spray and place over medium heat. Place 1 T. minced garlic in pan. Once garlic begins howling (okay, some call it, "sizzling"), empty the contents of the bag of the marinading chicken into pan. Cook about 5 to 10 minutes, until chicken is no longer pink and has a bit of brown color.
  3. Serve with sautéed vegetables, topped with a light sprinkle of feta, hummus (if desired), and/or dressing of choice in a lettuce "tortilla".

Tuesday, May 11, 2010

Mini Meatloaves

Mini meatloaves are so darn cute! Though easily confused for burgers, they take offense to such accusations, pleading that they are indeed distinct from your run-of-the-mill hamburger! Not only are they baked, but they are baked with a tasty sauce on top that gets all sticky and gooey and just plain finger-licking good. Meatloaves are also extremely versatile; by varying the type of meat, veggies, crackers, and spices you use, you're bound to never be bored by these little meat discs. I prefer the mini loaves over one large because they not only lessen the cook time required, but they make it so that each diner can enjoy a good smattering of sauce (what we all remember loving so much about the end pieces of the big loaves mom used to make).

Another thing I love about these babies: You can make them ahead of time. I would say no more than 2 nights ahead of time you can store these in the refrigerator in the dish you plan on using to bake them, well-covered with clear wrap. You might even be so lucky to have yourself someone handy to throw then in the oven (and maybe make some carrot fries as a side... please?) so that dinner is done when you get home, ragged and weary from Chicago public transportation. And nothing cures what ails you more than a good smile and some warm loavies.
The Stuff:
  • glass baking dish (about 8" by 11")
  • medium saute pan
  • 1 large mixing bowl
  • 1 medium mixing bowl
The Edibles:
  • olive oil cooking spray
  • about 2 c. mushrooms, chopped into small pieces
  • 1/2 red onion
  • 3 T. ketchup, divided
  • 2 & 1/2 T. barbeque sauce, divided
  • 1 & 1/2 T. worchestire sauce, divided
  • 2 T. milled flax seed
  • 3 T. water
  • 3/4 c. combination of crushed crackers and/or breadcrumbs
  • 1 T. garlic powder
  • light sprinkle of onion salt
  • about 1 T. dried oregano
  • about 1/2 T. dried thyme
  • shake of chili powder
  • pepper to taste
  • 1 pound ground sirloin
  • 3/4 c. chopped spinach (from frozen)
The Making:
  1. Preheat oven to 425. Spray baking dish with olive oil cooking spray.
  2. Spray a medium saute pan with olive oil cooking spray and place over medium heat. Add onion; cook 1 minute, stirring frequently. Add mushrooms and cook for 3 to 5 minutes longer, stirring frequently, until onions are translucent and mushrooms appear dark. Remove from heat and allow to cool for at least 5 minutes.
  3. In large mixing bowl combine next 5 ingredients, through water. Stir until fully mixed.
  4. In separate mixing bowl combine next 6 ingredients (crackers/crumbs through pepper) until all ingredients are equally distributed.
  5. Combine remaining ingredients in a small bowl and set aside. This will be the topping for your meatloaves.
  6. Add sirloin and spinach to the bowl containing the wet ingredients; mix with clean hands to get the meat and spinach fully incorporated with liquid sauce.
  7. Gradually add dry ingredients to the meat mixture, kneading the meat with your hands to ensure equal distribution. Form the meat into 5 or 6 patties (or as I like to call them, "mini meatloaves") and place in prepared baking dish. Top with 1 to 2 tablespoons of the sauce (step 4), and spread with a spoon.
  8. Bake at 425 degrees for 45 minutes, until they no longer are pink inside.

Tofu Spaghetti Squash with Kale

The preparation time for this dish is a bit up there, but don't let that scare you away. Flavored with copious amounts of garlic, ginger, and crushed red chili flakes, this meal is vitamin-packed and sure to leave you feeling energized. The benefits of dark leafy greens, coupled with a lean vegetarian protein, layered together with hearty spaghetti squash make this a meal that really helps you if you're short in meeting your five-to-nine goal (I'm talking about the recommended amount of fruits and vegetables you should be eating per day) while sustaining you for quite a while. It might seem like the recipe calls for an excessive amount of oil (and maybe I overestimated in my measurements), but the oil really lends a creaminess to the mixture that melds all the flavors together. The healthy fat contributed by extra virgin olive oil also makes this a long-lasting, well-rounded meal versus just a pile of vegetables with some protein.

From the creative mind of Marko (I believe that he said that this dish resulted from a combination of four or so recipes), I give you one dish that is really worth the effort. Need I add that it becomes more delectable overnight? Lunch the next day will knock you off your feet!
The Stuff:
  • a large, sharp knife
  • large glass baking dish
  • a cutting board
  • clean kitchen towel
  • paper towels
  • 2 - 3 large books
  • wax paper
  • gallon-size plastic bag (for marinading)
  • 1 medium sauté pan
  • 1 wok or large sauté pan
The Edibles:
  • one ginormous spaghetti squash (maybe about 4 pounds or so?)
  • 1 block tofu
  • 4 T. low-fat Italian dressing
  • 5-6 T. olive oil, divided
  • about 5 cloves garlic, minced (or the equivalent in jarred or powdered), divided
  • about 4 T. ginger, either fresh (finely minced) or powdered, divided
  • crushed red chili pepper flakes
  • sea salt to taste
  • ½ red onion, sliced into pieces ¼ inch by 1 inch
  • a bunch of kale, cut or torn into 1 inch peices
  • ¼ c. sundried tomatoes, sliced into ¼ inch pieces
The Making (for spaghetti squash):
  1. Preheat oven to 350.
  2. Using a strong, sharp knife, cut squash in half lengthwise. (This will be hard to do. I suggest a.) strong arms, b.) a strong man, or c.) sheer will, a.k.a. my method of choice.)
  3. Remove seeds using a spoon or fork, and place spaghetti squash cut sides down in a baking dish (or two if it's a large squash). Fill dish with about 1/2 inch of water.
  4. Bake for 30 minutes, or until a sharp knife can be inserted with only a little resistance. Remove squash from oven, and set aside to cool enough to be easily handled.
  5. Once cool, use a large spoon to scoop the stringy pulp from the squash, and set aside in a bowl.
The Making (for tofu):
  1. Slice tofu block in half so that you make two thinner slabs. On top of a cutting board place one clean, thick kitchen towel, folded in half once or twice. Place one paper towel folded in half on top of cloth towel; lay tofu slabs on top of paper towel. Cover tofu with an additional folded paper towel. Place 2-3 large cookbooks (or if you’re me, public health textbooks) on top of tofu, so as to press out some of the water. After at least 30 minutes, flip over cloth towel, replace paper towels, and flip over tofu. Re-cover with heavy books and allow the tofu to be pressed for at least 10 more minutes.
  2. After pressing, cut tofu into small pieces, about ½ inch in every direction. Cover a plate with wax paper; place tofu cubes on paper and place in freezer for at least 1 hour.
  3. Combine Italian dressing, 1 tablespoon olive oil, 1 clove garlic, ½ tablespoon ginger, salt, and a hearty shake of crushed red chili pepper flakes (maybe ½ tablespoon?) in a gallon-size closeable bag. Remove frozen tofu cubes from the wax paper and place in bag; marinade for at least 1 hour in the refrigerator or overnight if you are one of those who plan ahead.
The Making (the real deal... Tofu Spaghetti Squash with Kale)
  1. Once you’re ready to begin cooking, pull out tofu so as to help thaw it a bit more. You will use it soon.
  2. Cover sauté pan with 1 tablespoon extra virgin olive oil and place over medium heat. Dump the equivalent of 1 clove minced or powdered garlic in pan, pushing it around with your wooden spoon or spatula for about 30 seconds. Place onion in pan and stir around so as to ensure it is completely covered with oil. Cook for about 2 minutes on medium, then turn down to medium low. Stir frequently; cook until the onion turns somewhat translucent and is caramelized (really juicy looking).
  3. Cover wok or super large sauté pan with 1 tablespoon extra virgin olive oil and place over medium heat. Dump the equivalent of 1 clove minced or powdered garlic in cooking vessel of choice, pushing it around with your wooden spoon or spatula for about 30 seconds. Add kale by the handful, stirring frequently so as to ensure oil is distributed over its surface. The green will cook down significantly, so if you feel you cannot fit it all in at once, wait until some has cooked down and add more at that point. Once all the kale is looking really wilty, turn stove off. Add onion mixture to kale and set aside.
  4. Cover the sauté pan you used for the onions with 1/2 tablespoon extra virgin olive oil and place over medium heat. Dump the equivalent of 1 clove minced or powdered garlic in cooking pan, pushing it around with your wooden spoon or spatula for about 30 seconds. Empty the bag containing the marinating tofu over the pan. Make sure the tofu is in a single layer, but do not stir around. Allow the tofu to cook 5 or so minutes, checking every minute after 3 minutes. To check, carefully flip over 1 cube of tofu; you are looking for a dark golden crust (not burned, not barely colored, somewhere in between). Once your test reveals this, carefully move each cube so that another side is on the pan. Allow the cubes to cook for a few minutes to achieve the golden crust on another side. Then you can be impatient. Stir the tofu (no need to worry about flipping each individual piece anymore), and allow the cubes to cook for a few minutes longer.
  5. Meanwhile, re-heat your wok (or stand-in pan) to medium. Stir the kale-onion mix a bit to get the pieces loose. Add spaghetti squash, sundried tomatoes, 1 to 2 more tablespoons of olive oil, remaining garlic, ginger, and a generous amount of the crushed red chili pepper flakes. Add a bit of salt if you like. Give everything a good stir, making sure that the ingredients are well dispersed throughout the spaghetti squash. After fully mixed, add tofu and stir to incorporate fully.
  6. Serve topped with dried edamame (for crunch) and/or a sprinkle of crushed red chili pepper flakes or the rooster chili sauce (for heat… if you’re not a sissy like me)

Monday, May 10, 2010

One Super Salad

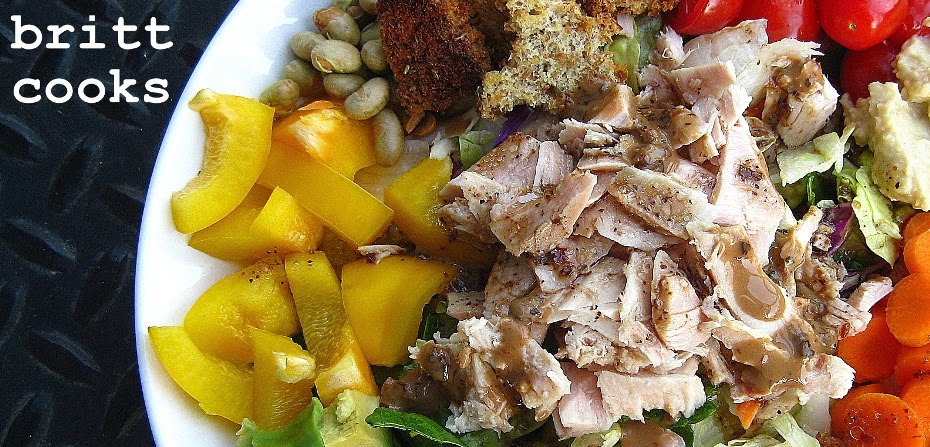
I take my salads very seriously. I have noticed that there are quite a few people out there that are completely oblivious to just how marvelous and exciting a salad can be. If you're mindful of your portions, salads can be healthful and chocked full with high-flavor additions.

So today I feature a salad that stands as an example for just how beautiful, filling, and satisfying a salad can be. Change up the ingredients based on your tastes and what you have on hand. My rule of thumb is to always have a few colorful vegetables, something crunchy, something creamy, something with some healthy fats, and something just for fun. I'm always a fan of a beautiful plate, and this one really made me smile as I ate.

The Edibles (serves 1):
  • 1/4 red bell pepper, chopped into large pieces
  • 1/4 yellow bell pepper, chopped into large pieces
  • 1/4 of a pint of cherry (or grape) tomatoes, sliced in half
  • 1 large carrot, peeled and sliced thinly
  • 1/4 of an avocado
  • handful of real bacon bits
  • about 2 T. hummus
  • about 2 T. dried edamame
  • about 2 T. crumbled feta cheese
  • 1 small can albacore tuna
  • homemade croutons (as many as you like), recipe below*
  • salt and pepper to taste
  • 2 T. creamy balsamic vinaigrette (from Trader Joes)
The Making (for the croutons):
  1. Preheat your oven to low broil. (You can also use high, but you'll have to watch them carefully).
  2. To make croutons, tear up a slice or two of your favorite multi-grain bread into bite-size pieces. Spray with olive oil cooking spray and sprinkle with garlic powder, Italian seasoning (or just use oregano, parsley, basil, etc.), and salt and pepper to taste.
  3. Broil the croutons; stay close to the oven, because they will cook quick. Once they begin to brown, flip them over and low broil on the other side. (Alternatively, if you're not feeling the whole "flip over each piece" idea, you can just cook on one side for a less all-over-crispy crouton.)
The Making (for the salad):
  1. Arrange salad components on your plate. Be creative!


Saturday, May 8, 2010

Granola Bars Two Ways: Chewy and Crunchy


I woke up today and decided I would make granola bars. Had I ever made them? Nope. Did that stop me? Not at all. I was on a mission to make some wholesome, vitamin-packed bars. Now, I didn't intend to make two batches, but having learned a few things my first go-around (the crunchy), I wanted to see if I could improve my recipe and make a tastier batch. I chose to include both recipes because I think they offer different things. Those who like their bars less sweet would likely prefer the crunchy over the chewy. Those who are averse to crunch would be more apt to select the chewy (makes sense, doesn't it?).

The first batch listed is the one I made second, the chewy. My mix-ins included pumpkin seeds, sliced almonds (coarsely crushed), sunflower seeds, dried apples, and cranberries.

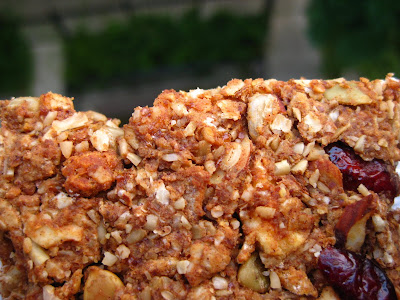
Prior to that batch I made one that was much drier, and consequently crunchier (and aptly named "The Crunchy"). This mix was also slightly less sweet, but the cranberries throughout the mix punctuate each bite with a tart sweetness that makes up for the use of less sweetener. In addition to the cranberries I added a bit of pumpkin seeds and sliced almonds for some healthy fats (and to add to the crunch-factor).

Like most of my recipes, and like most recipes for granola bars, the mix-ins are up to the creator. Whatever nuts or dried fruits you happen to have on hand (and enjoy, of course), would work with the basic mix. Think about the options; walnuts, dates, and coconut, or maybe macadamias, raisins, and apricots... now you know why I had to make two batches.

The Stuff:
  • 8" by 8" baking dish (you can use a pan, but my times are based on using a glass baking dish that was too large at 8" by 11"... it's still possible to form the granola into a rectangle that is smaller than the dish size, but I estimate that this recipe would fit perfectly in an 8 by 8 dish or slightly smaller)
  • parchment paper
  • small saucepan
  • medium mixing bowl
The Chewy
The Edibles (for the Chewy):
  • 1 T. butter
  • 1 & 1/2 T. honey
  • 1 T. oil
  • 1/4 c. water
  • 1/2 tsp. vanilla extract
  • 2 T. milled flax seed, divided
  • 4 packets Truvia (the equivalent of 8 T. sugar)
  • 1/2 c. oats
  • 1/4 c. oat bran
  • 2 T. protein powder
  • 1 T. wheat germ
  • 1/2 c. Kashi Good Friends cereal, coarsely crushed
  • 1 tsp. cinnamon
  • 1/4 c. sliced almonds
  • 1/8 c. pumpkin seeds
  • 1/8 c. sunflower seeds
  • 1/4 c. dried cranberries
  • 1/4 c. dried apple, chopped into sunflower seed sized pieces
The Making:
  1. Preheat oven to 325. Place parchment paper into baking dish.
  2. Place first 5 ingredients, 1 tablespoon milled flax seed, and 2 packets Truvia in a small saucepan. Set aside.
  3. Combine remaining ingredients in a medium mixing bowl, including the remaining 1 T. flax seed and 2 packets Truvia. Stir until ingredients are mixed.
  4. Heat saucepan over medium low for 2 - 3 minutes, or until it begins to boil. Stir vigorously. Allow the liquid to boil for 1 minute; remove from heat and allow it to cool for 1 to 2 minutes.
  5. Create a well in the dry ingredients. Carefully pour the liquid mixture into the well and stir with a fork. The mixture will be sticky. Use your fingers to make sure the ingredients are fully combined.
  6. Place granola mixture on the prepared pan. Press the mixture down firmly, ensuring that the bars will be equally thick throughout the pan.
  7. Cook at 325 for 15 minutes. Turn the temperature down to 300 and cook for an additional 30 minutes, or until the bars are slightly browned.
  8. Remove the dish from the oven and allow to cool 5 minutes. Cut the rectangle into 8 equally sized bars, but do not remove from the pan. Allow the bars to cool an additional 30 minutes (you've given them some time to rest and really grip together), after which you may enjoy to your heart's content!

The Crunchy
The Edibles (for the Crunchy):
  • 12 g. (slightly less than 1 T.) butter
  • 1 T. honey
  • 1/2 T. oil
  • 2 T. Sobe Yumberry Lifewater (or another low-calorie juice like liquid)
  • 3 packets Truvia (the equivalent of 6 T. sugar)
  • 1/2 tsp. vanilla extract
  • 2 T. water
  • 3/4 c. oats
  • 1/4 c. oat bran
  • 2 T. protein powder
  • 1 2/3 T. wheat germ
  • 1 & 1/2 T. milled flax seed
  • 1/2 c. Kashi Good Friends cereal, coarsely crushed
  • 1/2 tsp. cinnamon
  • 1/4 tsp. nutmeg
  • 1/8 c. sliced almonds
  • 1/4 c. pumpkin seeds
  • 1/4 c. dried cranberries
  • 2 T. low sugar vanilla pudding
The Making:
  1. Preheat oven to 325. Place parchment paper into baking dish.
  2. Place first 7 ingredients in a small saucepan. Set aside.
  3. Combine remaining ingredients up to (not including the pudding) in a medium mixing bowl. Stir until ingredients are mixed.
  4. Heat saucepan over medium low for 2 - 3 minutes, or until it begins to boil. Stir vigorously. Allow the liquid to boil for 1 minute; remove from heat and allow it to cool for 1 to 2 minutes. Add pudding at this time and stir well.
  5. Create a well in the dry ingredients. Carefully pour the liquid mixture into the well and stir with a fork. The mixture will be sticky. Use your fingers to make sure the ingredients are fully combined.
  6. Place granola mixture on the prepared pan. Press the mixture down firmly, ensuring that the bars will be equally thick throughout the pan.
  7. Cook at 325 for 15 minutes. Turn the temperature down to 300 and cook for an additional 30 minutes, or until the bars are slightly browned.
  8. Remove the dish from the oven and allow to cool 5 minutes. Cut the rectangle into 8 equally sized bars, but do not remove from the pan. Allow the bars to cool an additional 30 minutes (you've given them some time to rest and really grip together), after which you may enjoy to your heart's content!
Estimated Nutrition Facts (for the Chewy):
Calories: 150
Fat: 7g
Sodium: 86mg
Fiber: 4g
Carbohydrates: 19g
Protein: 6g

Estimated Nutrition Facts (for the Crunchy):
Calories: 135
Fat: 5g
Sodium: 80mg
Fiber: 3.5g
Carbohydrates: 20g
Protein: 6g