Showing posts with label appetizer. Show all posts

Sunday, February 27, 2011

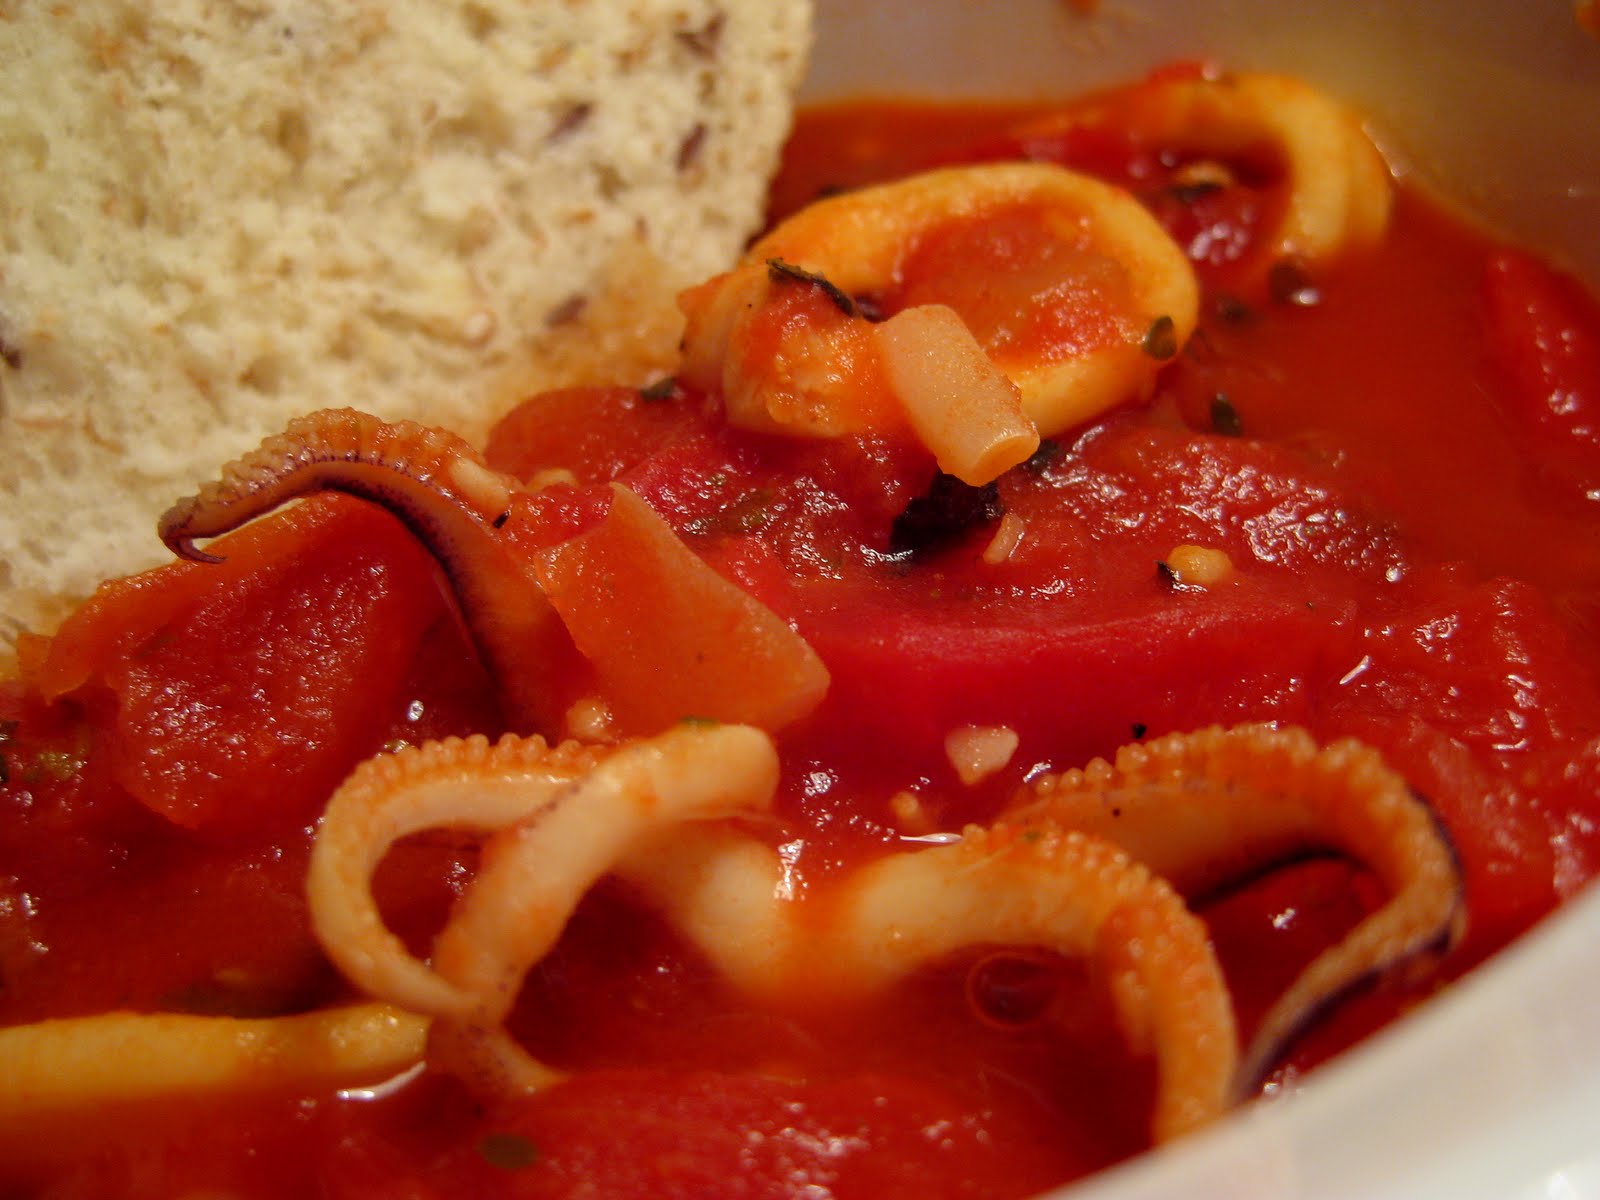
Calamari Bruschetta

It has been more than 2 months since I've posted my last recipe, but that doesn't mean I haven't been cooking up a storm! The many weeks of my absence have been full of small life changes such as moving across the country, starting a new job, and getting acclimated to a new apartment in a new city with a new culture. The shock hasn't really set in yet, but to say I've been feeling mildly disoriented would be putting it lightly. Couple my disorientation with the fact that my computer has 15 gigs of photos and videos slowing it down, the thought of adding some more is just downright daunting. Before you start getting all "an external hard drive would solve your problem and relieve your agony" on me, let me tell you that it's on my radar but ugg, could all of these moving costs just go away already?

Alright. Enough whining. More recipe-ing.

Being so close to the ocean, Philadelphia grocery stores and markets offer an array of sea creatures for purchase. I've been eying the crab, drooling at the shrimp, and swooning at the salmon, but all just seem to be a little pricey for a budget-conscious gal like myself. My solution? Calamari! At just $4 per pound, I selected two from a street market and it only ended up setting me back $1.67.

Today I'm featuring a dish that was inspired by a favorite appetizer of mine at Angelina's in Chicago. Squid is usually cooked rapidly so as to prevent the rubber band effect that can occur when overcooked. Interestingly, my research informed me that when calamari is cooked slowly, it becomes increasingly tender over time.

This is a very simple recipe that can be enjoyed in a variety of ways. It's full of tomatoey goodness (so if your boyfriend has heartburn issues like mine, it's best enjoyed with a glass of milk and some antacids). Feel free to add more mild, cooked vegetables (like diced carrots or sauteed spinach) to up the vitamin count. In a nutshell: this is low-calorie and protein-packed dish that happens to be down-right, unarguably, very delicious.
The Stuff:
  • non-stick olive oil cooking spray
  • medium-sized skillet

The Edibles:
  • 2 hand-length calamari, or about 1/4 to 1/2 pounds fresh or frozen calamari rings
  • 1 onion, diced
  • 2 garlic clove, minced
  • 1-28 oz. can diced tomatoes
  • 1/2 cup dry white wine
  • 1 bay leaf
  • pinch (or two) of dried cayenne pepper
  • hearty shake of dried oregano and basil (or fresh basil, if you're lucky and didn't kill your plant like I did)
  • salt and freshly ground pepper

The Making:
  1. Prepare fresh calamari by slicing into rings. (Follow these instructions if you're feeling uneasy about it.)
  2. Spray a skillet with olive oil non-stick spray; place skillet over medium heat. Add the onion and garlic. Stirring occasionally, for about 10 minutes or until the onion begins to turn translucent.
  3. Add the squid and saute for 3 minutes, stirring frequently.
  4. Add the tomatoes, wine, cayenne pepper, spices, salt and pepper and stir to combine. Bring to a boil, then turn the heat down low and cover. Cook uncovered on low heat for 15 minutes. Cover and cook on low heat for an additional 15 minutes.
  5. Remove bay leaf. Serve hot with fresh bread as an appetizer for 3-4 people; alternatively, serve over pasta (such as linguine) as an entree.

Sunday, September 19, 2010

Carrot Hummus

Not to toot my own horn or anything, but I'm pretty sure I'm going to be the best mom... at least when it comes to hiding vegetables in the food I feed my kids. Now, hummus is undeniably a staple in my diet, and there's no questioning its power food status, but I'm always looking for a way to amp things up a few notches in the vitamin/mineral components of any dish. Adding canned or frozen carrots provides some additional vitamin A; these carrot forms are softer and therefore blend quite a bit easier into the hummus. By all means one could boil fresh carrots and achieve the same effect. Further amping up the hummus with a scoop of unflavored protein powder gives each serving a gram or two more of satiating protein. Adding protein powder to meals can be especially important if one's diet is primarily vegetarian. At least I think it is... supposedly Americans get more than enough protein...

Anywho, this hummus is tasty and packed with nutritional benefits. Lately, when I'm not experimenting with edamame, spinach, or red pepper versions, this is my go-to recipe. It's pretty straight-forward, and (as you may have guessed by my use of approximate amounts) extremely forgivable.
The Edibles:
  • 1 16-oz. can of garbanzo beans (also known as chick peas), rinsed and drained
  • 3/4 of a 16 oz. can of carrots (or about 1 c. frozen carrots, thawed), drained
  • 1 T. tahini (sesame seed paste)
  • 1 tsp. extra virgin olive oil
  • 2 T. lemon juice
  • 2 cloves garlic (or the equivalent in jarred or powdered)
  • generous sprinkling of fresh or dried parsely
  • generous shake of ground coriander
  • light sprinkle of onion salt (alternatively you could use onion powder generously)
  • 1 scoop natural, unflavored protein powder
  • enough water to get the blender/processor blade a-movin' (add 1 T. at a time)
  • sea salt and black pepper to taste
The Making:
  1. Whir together all the ingredients in a food processor or blender.
  2. If you're patient, chill hummus for at least 30 minutes. (You'll be amazed by how much more intense the flavors become in such a short amount of time!)
  3. Store in a sealed container for maximum one week.
Serving Suggestions: Serve with pita chips, pretzels, cucumber slices, bagel chips, or (gasp!) carrots!

Kick-off Chicken Bites

It's football season, so what's more appropriate than some buffalo chicken bites? Getting their crunch from an oven bake, rather than deep fry, these babies are a healthy take on the classic fried chicken wing.

Unfortunately, I'm a bit of a wuss when it comes to spicy foods, so these are a tamed-down version. Of course more hot sauce could be added if you happen to have a stronger palate. With the addition of honey mustard, these nuggets are slightly sweet, but they still have a bit of a kick, so they are a good middle ground that will please a crowd. I served our nugs with some good ol' fashioned corn bread, because I'm fancy like that.
The Edibles:
  • 1/2 c. all-purpose flour
  • 1/2 tsp. cayenne pepper
  • 1/2 tsp. garlic powder
  • 1/2 tsp. onion powder
  • 1 T. parsley
  • 10 chicken wings (or 3 chicken breasts, cut into bite-sized chunks)
  • olive oil cooking spray
  • 2 T. melted butter
  • 3 T. hot pepper sauce (such as Frank's RedHot®)
  • 3 T. barbecue sauce
  • 1 T. ketchup
  • 4 T. honey mustard
  • 2 T. worcheschire sauce
  • 1/4 c. water
The Making:
  1. Place the flour through parsely into a resealable plastic bag; shake to mix. Add the chicken, seal, and toss until well coated with the flour mixture. Refrigerate for an hour if you have the time.
  2. Preheat oven to 400 degrees F (200 degrees C).
  3. Line a baking sheet with aluminum foil, and lightly grease with cooking spray. Remove chicken from bag and place on prepared baking sheet, allowing space in between the pieces.
  4. Bake until the chicken is no longer pink in the center, and appears golden on the outside, about 45 minutes (time will be less if you have small cuts of the chicken). Turn over halfway during cooking so they cook evenly.
  5. While the chicken cooks, wisk together the butter and remaining ingredients overhot sauce in a small saucepan placed over low heat.
  6. Once cooked, carefully dip the wings into the sauce mixture, and serve!

Sunday, August 22, 2010

Edamame Power Hummus

Some call edamame the super or wonder vegetable because it is the only vegetable that contains all nine essential amino acids. This makes edamame a complete protein source, similar to meat or eggs. Edamame also contains isoflavonoids. They are found in all soy products and are being studied for their health benefits.
Although most researchers agree that further research is needed, recent studies propose the following possible health benefits of soy:
  • Soy protein may help reduce insulin resistance, kidney damage, and fatty liver in people with diabetes, according to a study in rats.
  • A new study from the Chinese University of Hong Kong indicated that soy protein containing isoflavones (phytoestrogens) significantly reduced overall cholesterol and LDL "bad" cholesterol, and raised HDL or "good" cholesterol, especially in men.
  • A study in women reported that regular consumption of soy foods was associated with healthy cholesterol levels.
  • The component thought to be at least partly responsible for soy's health benefits is a type of phytoestrogen called isoflavones. Isoflavones also appear to work with certain proteins in soy to protect against cancer, heart disease, and osteoporosis.
  • Results from a new study in China suggest that eating more soybean protein may help prevent and treat hypertension.
  • A study in which 12 postmenopausal women drank 36 ounces of soy milk daily for 16 weeks noted an anti-inflammatory effect of the isoflavones found in soy. According to the study authors, this may be important in the prevention of bone loss and cancer, among other things.
I found my edamame pre-shelled in the frozen foods section of Trader Joe's. It is rarely sold fresh, but it is available frozen year-round. Don't fear frozen veggies; studies have shown that they can be just as--if not more--nutritious than their fresh counterparts. Of course, some taste better when eaten fresh (zuchinni and asparagus to name a few), but edamame is one vitamin powerhouse that maintains its punch (and subtle crunch) when thawed.
The Edibles:
  • 3/4 of a 16-oz. can of garbanzo beans (also known as chick peas)
  • 1/2 c. edamame, shelled
  • 1 T. tahini
  • 2 T. lemon juice
  • 2 cloves garlic (or the equivalent in jarred or powdered)
  • generous sprinkling of fresh or dried parsely
  • generous shake of ground coriander
  • light sprinkle of onion salt (alternatively you could use onion powder generously)
  • sea salt and black pepper to taste
The Making:
  1. Whir together all the ingredients in a food processor or blender.
  2. Refrigerate for at least 30 minutes for prime flavor-age. Conversely, you can be like me and excitedly use any vessel on hand to deliver your Edamame Power Hummus straight to your tongue. Store in a sealed container for maximum one week.
Sources:

Sunday, August 1, 2010

Deviled Tomatoes

A few nights back, as we prepared dinner, Jay mentioned this appetizer in passing, but with a definite "they were ahhhh-mazing." We tend to speak in code. Calling someone else's food, "ahhhh-mazing" is like a challenge to my own, and he knows it. The question was... could I recreate it such that it would produce a similar reaction? I asked for more specifics, and Jay went on to tell me that at a recent backyard gala of sorts a friend's mom served a filling similar to that provided below and spooned it into what I'm guessing were de-seeded grape tomatoes. Feeling less ambitious, I chose to make these using plum tomatoes which would require a less concentrated effort to de-seed.

I'm not going to lie, the bacon does contribute to the depth of flavor, but I think vegetarians could enjoy this bite sans animal and still enjoy it. I recommend making the filling at least 30 minutes ahead of time in order to allow for maximum flavor melding.

"Now, what was the result?" you ask. It was undoubtedly a harried rendition of the inspiration appetizer, but Jay was left speechless.
The Edibles:
  • 1 T. mayonnaise or miracle whip
  • 2 T. greek yogurt
  • 1 T. dijon mustard
  • 2-3 T. sharp cheddar cheese, shredded
  • 1/4 tsp. garlic powder
  • 1/4 tsp onion powder
  • 2 T. real bacon bits (omit if making for vegetarians)
  • 2 plum tomatoes, halved, seeds scooped out
  • chopped chives, sea salt, and pepper to taste
The Making:
  1. In a small bowl mix together first 7 (6 if you're a veggie) ingredients.
  2. Portion out filling into the four plum tomato halves. Top with chives, sea salt, and pepper to taste.
  3. Serve at your most classy of get-togethers.

Thursday, July 1, 2010

Spinach Hummus Dip

Feeling like hummus? Feeling like spinach dip? Not sure which way to turn? A marrying of two of my favorites, this dip can satiate your taste buds if you happen to be like me, trying to appease conflicting desires. What would be a typical spinach dip is kicked up a notch with the addition of garbanzo beans. Providing some of that hummus-like graininess, this dip is substantial but light-tasting, and the side to a tray of fresh vegetables and hearty crackers or bread.

This dip is super easy to throw together if you use a pre-made spinach dip powder. I found mine to be rather bland, so I ended up adding about 1/2 tablespoon dried dill and a sprinkle of both garlic and onion powder. I recommend allowing the flavors in your dip to meld a bit in the refrigerator before you make any significant spice additions.
The Stuff:
  • food processor or blender
The Edibles:
  • 1/2 c. frozen spinach, defrosted
  • 1 c. plain yogurt
  • 1/2 c. (4 oz.) light cream cheese
  • 1 c. garbanzo beans
  • 1 package spinach dip mix
The Making:
  1. Whir together all the ingredients in a food processor or blender.

Wednesday, June 2, 2010

Watermelon Feta Salad on a Stick

It's officially summer. Despite the negatives that I associate with Chicago in the summertime (such as pressing up against sweaty commuters in a crowded train that smells like B.O.), there are overwhelming positives that make that El ride more bearable. One of my favorite things about summer is the fresh produce. It's the season for berries, tomatoes, and melons, and knowing this I rushed out and purchased my first (and most definitely not my last) watermelon.

This coupling has been on my mind since last summer. I love feta, I love watermelon, so the thought of pairing the two in a salad or something like that sounded simply marvelous. Feeling somewhat lazy and not really willing to make the trek to the grocery store to pick up any additional ingredients, I chose to make a small, simple appetizer that provides all the beauty of this sweet and salty combination. In the meantime, feel free to drool over this salad that inspired all of my desires. Perhaps a copy-cat (with variations, of course) will follow in the near future.
The Stuff:
  • toothpicks (if you're feeling fancy)
The Edibles:
  • watermelon, cut into large chunks
  • fresh spinach
  • crumbled feta
  • balsamic vinaigrette
The Making:
  1. Place one chunk watermelon atop one spinach leaf and top with a pinch of feta. Poke toothpick through spinach leaf, securing the watermelon in the spinach envelope. Drizzle lightly with balsamic vinaigrette. Serve to your most distinguished guests.

Thursday, May 20, 2010

Baba Ganoush

I'm no expert at this, but here's my attempt at Baba Ganoush, a hummus-like dip made from cooked eggplant. Curiously, a baba ganoush recipe was requested by my aunt, who has recently shared with me that she doesn't think she will ever follow my recipes exactly. I guess I can't blame her, because I'm the same way, but why then, I wonder, does she make special requests for me to feature a dish? Is it for the pictures?

Often served with pita chips, bell pepper strips, and other veggies, it's loaded with vitamins and essential nutrients. Tahini is a good source of calcium, protein, B vitamins, and essential fatty acids. Eggplant is a great source of antioxidents (disease-fighters), and the skin contains Nasunin. This is a potent antioxidant and free radical scavenger that has been shown to protect cell membranes from damage. Knowing this, I did add about half of the not-so-charred skin back into my ganoush. The addition provided a bit of smokey flavor and a bit of texture.
The Stuff:
  • baking sheet
  • blender or food processor
The Edibles:
  • 1 medium-small eggplant (mine was about 1 pound)
  • 1 T. tahini (roasted sesame paste)
  • 1/2 tsp. lemon juice
  • 1 clove garlic, minced (or the equivalent in jarred or powdered)
  • sprinkle of chile powder
  • generous shake of ground coriander
  • 1 T. dried parsley or cilantro leaves
  • optional: 1 T. olive oil
  • salt and pepper to taste
The Making:
  1. Preheat broiler to high. Use a fork to prick eggplant a few times; place on a baking sheet and set directly under broiler to crisp/char skin of eggplant. This can also be done over a charcoal grill or using the stovetop of a gas stove. Watch carefully and turn occassionally in order to evenly char.
  2. Change oven temperature to 375 and roast eggplant in the oven for 20 to 30 minutes, or until they're completely soft. You can test the softness by poking plant with a paring knife; if you have no resistence, your eggplant is done.
  3. Remove from oven and let cool.
  4. Slice the eggplant in half and scrape use a spoon or fork to scoop out the pulp. Puree the pulp in a blender or food processor with the other ingredients until smooth.
  5. Taste, and season with salt, pepper, and additional lemon juice, if desired. Chill for a 3 hours for best results.

Tuesday, May 4, 2010

Red Pepper Sesame Hummus

For me, hummus is a comfort food. I like it best accompanied by a grainy bread, although lately I've been enjoying its creaminess atop veggiful salads. I am partial to a thick consisency over the super-pureed type, so this recipe makes one chunky lump of hummus. Like soup, this dip is extremely forgiving when it comes to the amount of spices you use, and the flavors undoubtedly enhance overnight. As always, add any salt-containing spices slowly, tasting each time. Or you could forgo salt entirely, because there is likely to be some in the canned garbanzo beans (if you choose to use canned).

I added a red pepper on the recommendation of Marko, and I think that it added some nice color (and vitamins)! Often I will supplement the hummus with a spoonful of protein powder. The type I use is pretty flavorless, so I can add it to almost anything. If you choose to use some, you'll find that it really helps thicken up the hummus even more; overnight the hummus will go from pretty thick to "woah man" thickness. Your pita chips better not be wimpy.
The Stuff:
  • food processor or blender (I've been equally successful with both, as long as your blender is not from 1980)
  • medium mixing bowl (or a tupperware you plan on using to store your hummus)
  • fork, pestle, or fine-slatted potato masher

The Edibles:

  • one 16-oz. can of garbanzo beans (also known as chick peas, or cici in Italian :-)
  • 1/2 fresh red pepper, chopped
  • 1/2 to 3/4 c. water
  • 1 tsp. sesame seed oil
  • 1 T. lemon juice
  • 2 cloves garlic (or the equivalent in jarred or powdered)
  • generous sprinkling of fresh or dried parsely
  • generous sprinkling of dried oregano
  • super generous shake of ground coriander (if you like it with a little zing)
  • light sprinkle of onion salt (alternatively you could use onion powder generously)
  • 1 T. protein powder (I use this type)
  • salt and pepper to taste

The Making:

  1. Pour 1/2 to 2/3 of the can of beans and chopped red pepper into your blending contraption of choice. Place the remaining beans into the mixing bowl and set aside.
  2. Pour enough water into the blender so that it covers 3/4 of the beans. Blend it for 5 seconds. Place the remaining ingredients into the blender. Blend until well combined.
  3. With the remaining garbanzo beans, take your smashing device and crush those babies. Continue to smash them and mix them up until they're a thick paste. Don't worry, there will be lots of skins, but that makes it yummy!
  4. Pour the blended/pureed beans atop the hand-smashed beans. Stir to combine. I would recommend refridgerating for at least 30 minutes, but sometimes if you have a craving...